Recipes and Tips for Healthier Living and Smarter Budgeting

Friday, September 28, 2012

More Surprises in the Chicken Coop

A couple weeks ago I posted about the wonderfully large, two-yolked egg one of our chickens laid. Well, last week, we got the exact opposite: a teeny, tiny egg with a yolk that looked like a little splash of yellow paint (and the membrane under the shell was so tough!). Here is a picture of how small it looked in my husband's hand.

Needless to say, it was useless--but it did provide lots of laughter.

And the hen who laid it seems to have finally figured things out in the egg laying business (knock on wood).
Hmmm... Maybe that lecture I gave her about pulling her weight and earning her keep did the trick...

Medium-sized homegrown egg (left) next to teeny egg (right)

Wednesday, September 26, 2012

Lavender

Lavender essential oil is one of the most versatile oils there are, which is why it is also one of the most popular. And because it is so gentle, it is very well tolerated by most people, including babies.

Speaking of babies, the other day, I tried lavender on my son's diaper rash for the first time. He has been getting bad diaper rashes lately, and while diaper rash ointments help somewhat, they don't do the job quickly enough or do as good of a job as they should.

One night, shortly before his bath, I noticed that his rash was particularly painful. So I added three drops of lavender to the bath water and then proceeded to bathe him and his sisters. He thoroughly enjoyed the water, so I let him stay in it for about 30 minutes. When I took him out and dried him off, I noticed that his diaper rash was greatly improved. In fact, the redness and soreness was so reduced I couldn't believe it! That is fast-acting stuff, and powerful too (remember, I only used three drops in all that water)!

Seeing this result, I decided to try lavender on a burn I got while cooking a few days later. Generally I'll use aloe vera on burns, but I knew lavender was great for healing burns, too, and I hadn't really tried it before. I'm so glad I did! My burn healed much faster than usual and only hurt the first day. So maybe our aloe vera plant has been demoted to decorative purpose only...

Monday, September 24, 2012

Sunshine Soup

This soup is made with yellow summer squash from our garden, and is so pretty I like to call it Sunshine Soup. It looks so cheery (hard to capture with my camera) and the taste is delectable. Plus, my girls don't even complain too much about eating it (since there really isn't anything to complain about), and it's a very simple recipe. I found it on the Taste of Home site and made very few modifications.

Sunshine Soup
Yield: 6 servings

5 small yellow summer squash, cubed
2 green onions, cut into 3-inch pieces (or half a regular onion, diced)
2 tablespoons butter
1 can (14-1/2 ounces) chicken or vegetable broth
1/2 teaspoon salt
1/8 to 1/4 teaspoon white pepper
1-1/2 cups heavy whipping cream (I just used milk)

In a large saucepan, saute squash and onions in butter until tender. 
Stir in broth, salt and pepper; bring to a boil. 
Reduce heat; cover and simmer for 20-25 minutes or until vegetables are tender.
Cool slightly. Process in batches in a blender (or use immersion blender right in pan); return all to pan. Stir in cream/milk and heat through. 

Thursday, September 20, 2012

Kitchen Healthcare

While I believe there are measures governments can take to promote better health and wellness for their people, ultimately our individual health is up to us. And it starts in our own homes.

Tuesday, September 18, 2012

Marigolds

My husband planted marigolds in our backyard traditional garden this year as a natural pest control. We've tried this a couple times before but never gotten to them to grow very well from seed. This year they did awesome! I've never seen marigolds this huge before. It's so fun!


As you can see, they're several inches taller than my 16-month-old. With any luck, they'll seed themselves throughout the garden plot for next year.

In the gardening book, Just the Facts (p. 33), it states that marigolds are "The workhorse of the pest deterrents. Plant throughout garden to discourage Mexican bean beetles, nematodes, and other insects."

They're so pretty, too! Why wouldn't everyone want them scattered throughout their gardens?

Posted by Picasa

Friday, September 14, 2012

Homegrown Eggs: The Process

Our most mature hen finally started laying a couple weeks ago. Let me tell you, that first time was an exciting day!

And so were the next few, because it took Red a while to get accustomed to it. I don't know exactly what happened or what went through her mind (do chickens think?) when she laid her first egg. But since I discovered it, broken, in the dirt of the chicken run one afternoon, I imagined Red didn't know it was coming or what to do about that feeling, that it came out unexpectedly and maybe she was even standing up (hence, the break). I was so glad to see none of the chickens had eaten it, and after that I paid close attention each morning. The next day Red made it to the nest box (smart chicken!), but either she or one of the others pecked it. So we didn't get that egg either. The next egg was also pecked, but not very deep, so I was able to salvage it. The following day, Red laid a "nude egg" (meaning it had no shell)--ugh. So we potentially had two problems: 1) Red needed to be broken of her egg-pecking tendencies, and 2) maybe she needed more calcium in her diet.

To address the first problem, I decided I needed to put golf balls in the nest box (an "old wives" remedy that often works) to train her to think eggs can't be pecked into anymore than golf balls. But I don't have any golf balls and didn't want to spend money on a pack of them when I only needed one or two. Then I spotted a couple of rocks about egg-sized that were also egg-shaped and thought it was worth a try. It worked! No more pecking.

The second potential problem I addressed by adding oyster shell to the chicken food, even though there is calcium in their feed--just to be safe. I don't know if that helped or not, but the shells are plenty tough now.

Pretty soon I noted that Red goes into the coop about the same time every morning and spends about half an hour in there. When she comes outside again, I know I can go in and collect her egg. What's funny is how the other two keep her company sometimes, while she's busy in there, as if encouraging her.


Last week, Daisy (the yellow one) started clucking so loud we could hear her from inside our house. It was pretty funny and went on and on, two mornings in a row. (My husband jokes that she was in "labor" for two days.) By the afternoon of the second day, she had laid her first egg, so we were excited all over again. Although, one day there was also a very smashed egg in the nest box (with only a bit of shell left to hint that it had really been an egg). A few days ago, Gizmo (the black and white) must have also laid an egg because we found three eggs that day. Now we just need to work on consistency!

The funnest surprise so far was the huge egg Red laid (on the right)--larger than a Large egg from the store (on the left):

Come to find out a couple days later, it was so big because it had two yolks


(See the egg at the top of the picture with two yolks touching?) 
I have also noticed how much yellower--sometimes even orange--the homegrown eggs are. In this picture the store bought egg is the big one on the left. 


Homegrown eggs make this whole backyard chickens journey worth it!

Wednesday, September 12, 2012

What I Love About Having Chickens

Besides the obvious benefit of homegrown eggs (which we've just started getting--I'll write more on that later), I love having chickens because:

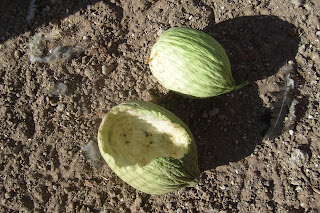
1.  They eat our garden veggies that I didn't catch until they were too big to be good for people food. And they go to with gusto! Both of the cucumbers pictured here (yes, cucumbers--I still don't know what kind they are, but they're good) grew to about the size of footballs. Instead of feeling guilty for not seeing them sooner, I just happily picked and threw them to the chickens. And in no time at all the girls had gutted the lower one.

2. (To go along with #1) They have helped us cut down on the amount we throw in the compost pile (which had kind of gotten out of hand) since they eat just about everything.

3. They're pretty creatures and provide interest to our backyard. They're also entertaining to watch when they get into squabbles, decide to take a dust bath, or just scratch and peck around in the dirt.

4. They're social and need to be around each other, which is fun to see. And they come running when one of us goes out there.

5. My children love them! Especially our16-month old.

Monday, September 10, 2012

Trimming Tomato Plants

I thought this picture was an interesting illustration of how well Mel's method of growing tomatoes works. (That's Mel Bartholomew, creator of the Square Foot Garden.) Both piles were picked the same day. The one on the left has 10 tomatoes, while the one on the right has 9.

On the left are the tomatoes I picked from my neighbor's traditional backyard garden while they are out of town. On the right are those I picked from one of the square foot gardens in our backyard. Both are sun-ripened, yummy garden tomatoes. But ours, as you can see, sometimes even split from growing so large.

I know there are other factors to consider, such as soil and amount of sun and water received regularly, but I feel that my trimming of the plants has really increased the growth of my tomatoes this year.

I had never heard of trimming tomato plants until the first time I read Mel's book, All New Square Foot Gardening, several years ago.

I understood the concept but wasn't convinced of its effectiveness. On page 159, Mel writes: "The theory behind pruning to one single stem is that all the energy goes straight up the main stalk, and you will have more tomatoes per square foot than if you allow it to put energy into branching out." Makes sense, doesn't it?

The first time I did this (a few years ago), I religiously trimmed the "branches" once a week. I don't remember if our tomatoes were bigger than usual that year, but it did seem like the tomatoes were being a little overwhelmed by our Arizona sun (even in the cooler mountains, where I lived). And when I explained Mel's method to my mom, who lives in the southernmost part of Utah, where the summer sun and heat get extreme, she was doubtful that this method would work there, for the same reason. Those tomatoes needed their branches to shade and protect them, she thought.


So this year, in northeastern Utah, I put those two trains of thought together and it has worked beautifully. I don't get around to trimming branches every week, and I leave many of them on for shading and stability, but I've found that trimming out extraneous limbs gives space for air and sunlight to get down into the plants and ripen the tomatoes. And we've never grown tomatoes this big!

Thursday, September 6, 2012

Kale Chips

We got a bunch of Tuscan kale in a recent Bountiful Basket and I decided to make kale chips out of it. (You can find the recipe at bonapetit.com.) I didn't hold out very high expectations that my kids would like kale this way, but I had to try. And I'm so glad I did! Surprisingly, all three of my kids loved the "chips", despite the bitter aftertaste (which I didn't mind).* Plus, the recipe is super easy.

*I have now tried this recipe with a few different kinds of kale--including the beautiful purple variety. It works on all of them--and the purple kind didn't even have an aftertaste.

Kale Chips

About 12 large Tuscan kale leaves, rinsed, dried, cut lengthwise in half, center ribs and stems removed
1 tablespoon olive oil
Salt and pepper

Preheat oven to 250°F. Toss cut kale with oil in large bowl. Sprinkle with salt and pepper. Arrange leaves in single layer on 2 large baking sheets. Bake until crisp, about 30 minutes for flat leaves and up to 33 minutes for wrinkled leaves.


Tuesday, September 4, 2012

Pickle Recipe, Updated

I posted this recipe last year, but as I have been canning more pickles lately (every Saturday for three Saturdays in a row, to be exact), I saw the need to update the recipe to be more understandable.

Here is my mom's pickle recipe. Use as-is for 7 quarts. For 7 pints, cut recipe in half.

HOMEMADE PICKLES
Yield: 7 quarts

2 1/4 quarts water (or 9 c.)
1 1/2 quarts vinegar (or 6 c.)
3/4 c. canning salt (make sure it's canning salt)
3 allspice in each quart bottle
1 clove garlic in each quart bottle
1 hot pepper (if desired) in each quart bottle--Shilling whole chillies (I like it without these)
1 long stem of dill in each quart bottle

Clean and boil quart bottles. Allow to cool. Clean cucumbers. Put allspice, garlic, pepper (optional), and dill in jars. Put in cucumbers (sliced or whole). Bring water and vinegar to a boil, then add salt. Fill and seal one jar at a time.

I processed them by using the boiling bath, and used these rules to determine how long to keep them in (time calculated after pot has resumed boiling): 

Altitude adjustment:
  • 1000-6000 feet, pints 15 minutes, quarts 20 minutes.
  • 6000+ feet, pints 20 minutes, quarts 25 minutes. 
Note: You can buy canning salt in a paper bag or a box and it says canning salt. It is just plain salt--nothing added. If you have trouble finding it at the store, you might try looking on the internet; I saw it there. Find the dill in the fresh produce (I once found some in a little container) or a neighbor's garden.

LinkWithin

Related Posts Plugin for WordPress, Blogger...